Whether you are manufacturing parts for pure battery electric, mild hybrid or plug-in hybrid vehicles, Adcole has EV automated shaft measurement machines for your high-performance manufacturing needs. Engineered to provide accurate and repeatable data, Adcole EV metrology systems provide electric motor rotor, drive, gearbox/transmission, output, balance, eccentric and other shaft manufacturers certainty that key production specifications can be held.
Overview
Some key parameters that Adcole EV shaft gages can evaluate:
- Bearing diameter
- Roundness
- Straightness
- Chatter
- Center Deviation
- Runout
- Surface roughness
- Taper
In addition, EV shaft gages evaluate linear features, such as:
- Axial locations
- Axial scans of bearing surfaces todetect bearing crowning or barreling
- Parallelism
- Perpendicularity
- Profile
- Ridge Detection
EV Shaft Measurement Machines
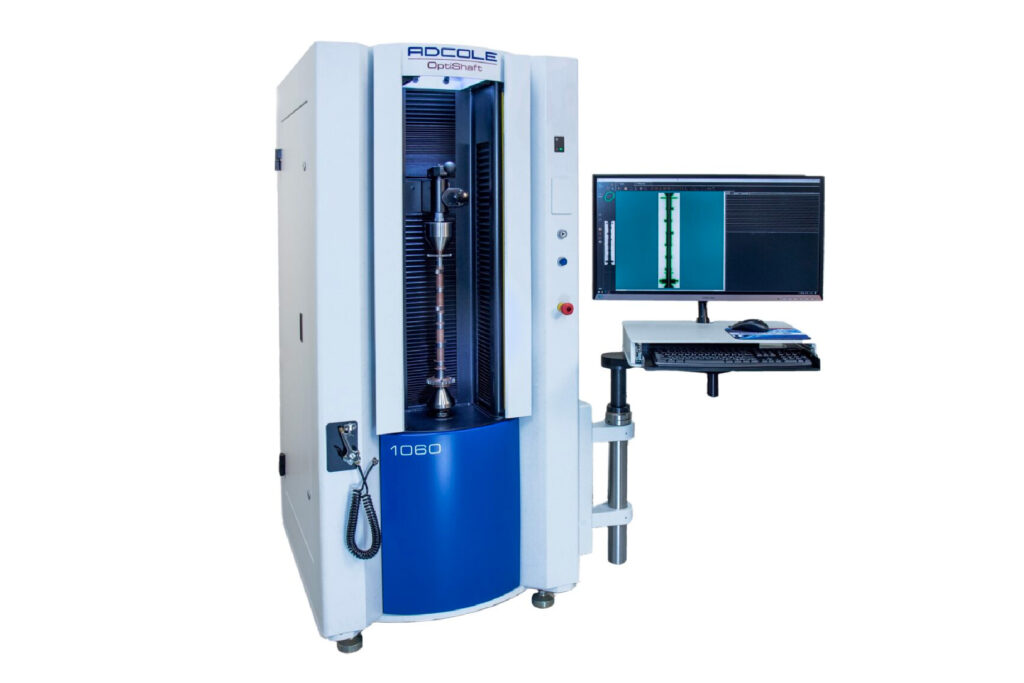
Model 911 EV Automated Shaft Gage
The Adcole model 911 gage is a semi-automated shaft metrology system that combines comprehensive, high-accuracy GD&T measurements with ease of use. These gage models are manually loaded with parts oriented vertically and are equally suited for use in the measurement lab or in harsh environments alongside or in the production line. With five maximum length capacity options of 610mm (24”), 920mm (36”), 1530mm (60”), 2290mm (90”), or 2670mm (105”), you can be certain that Adcole has gage models that can meet your specific EV manufacturing needs.
Benefits of the 911 EV Shaft Gage
- Reduces labor and material costs with superior gage accuracy and reliability
- Eliminates operator error with one button testing, concise pass/fail inspection reports, and more
- Measures multiple part types and complex geometries
- Provides numerical and graphical representation of complex metrology data
- Enables manufacturers to measure multiple part types using a flexible gage platform
- Available with optional DiaMetric™ Follower System
Model 1302, 1304, 1306 High-Speed, Multi-Head Horizontal EV Shaft Gage
Model 1302/04/06 gages are horizontal, multi-head cylindrical coordinate measuring machines that provide extremely accurate EV manufacturing measurement data for rotating components at a higher throughput than single-head models. These gage models can be automated for robot or gantry loading. EV manufacturers choose these gages for fast inspection speeds in a flexible platform for performing audit gage or high-speed in-line production gage tasks. Changing between part types is simple with programmable follower positions and an optional power tailstock.
Benefits of the 1302/04/06 EV Shaft Gages
- Supports 2–4 independent measuring heads that canmove to positions for easy part load/unload
- Measures up to 60 parts per hour
- High sample rate of 3600 data points per revolution (every 1/10 of a degree)
- Simple and user-friendly programming
- Can be outfitted for audit tasks or inline production operations
Model 1000 and 1000-Z Automated EV Surface Roughness Measurement Machines
Adcole Model 1000 and 1000-Z gages are our most advanced automated systems for measuring surface roughness and finish on EV shafts and other cylindrical components. Model 1000 EV shaft gage includes horizontally and vertically configured Taylor Hobson non-skidded probes for tactile surface finish measurements on multiple surface locations. In addition to the tactile capabilities of the standard Model 1000, the Model 1000-Z adds a Zygo non-contact optical interferometer probe for 3-dimensional surface finish measurement capabilities.
Benefits of the 1000 EV Shaft Gage
- Easy-to-use operator interface and software
- Windows-based interface for flexibility and compatibility
- High data density: 2000 data points per mm
- Self-contained, sealed and air-conditioned operator console for both shop floor and lab environments
- Simple menu-driven utility programs for making changes or setting up a new part
- Statistical data can be maintained for process control or forwarded to centralized SPC data collection point
- Stylus tips are calibrated and verified using a multi-patch master
- Gage sits on isolator mounts to eliminate objection-able vibration
- Fast cycle times permits more parts to be inspected per shift
Additional Benefits of Model 1000-Z EV Shaft Gage
- Both tactile and optical, non-contact surface finish inspection within the same machine package
- Precise laser Interferometer provides 0.005 μm ra- dial resolution for very accurate optical surface finish measurements
- Offers quantifiable means to measure parameters such as waviness that standard roughness Measurement systems cannot measure
EV Metrology Software
Through decades of EV metrology software development combined with unique and comprehensive applications expertise, Adcole’s suite of EV metrology software offerings enable measurements that transcend typical EV gage results. Capabilities range from visible cues of manufacturing results, to grinder performance improvement through process loop feedback, and even unique filtering capabilities to reduce the effect of dirt in the environment.
3D Color Map Software
Adcole 3D Color Map EV metrology software helps organizations improve their EV manufacturing process by quickly revealing non-conformity issues that are often overlooked in standard audit measurements. 3D EV color map inspection software tool reports roundness, profile, and size error run parameters, plus many other parameters.
Real Time FFT Chatter Analysis
Chatter is the undulating pattern of marks on a machined surface, usually caused from unwanted vibration during the grinding process. Adcole Chatter Analysis EV metrology software detects high frequency undulations, and determines the measured amplitude at each specific frequency or undulations per revolution (UPR).
Adcole FFT Chatter Analysis Software is a tool that allows EV manufacturers to pinpoint grinder performance issues that occur while producing precision-ground rotary shafts. Chatter Analysis software allows users to look at full 360° data set, or at a specific angular region within the error file.
Asperity Removal Software
An asperity is a small projection from the surface such as dirt which produces a measurement result that is not intended to be a part of the component that is being measured. Adcole’s Asperity Removal EV shaft measurement software can filter dirt measurements from radial and linear data, based on the definitions set up by the operator.
Material Build-Up & Advanced Straightness Software
Adcole Material Build-Up & Advanced Straightness EV metrology software is an advanced linear scan data analysis package. The software is used to detect any “material build-up” on the leading or trailing edge of the scan. Material build-up is usually found in a zone outside of the straightness calculation range.
This proprietary EV shaft measurement software provides the means to specify the linear scan reduction method for determining the area for straightness, concavity and convexity, including two edge sections for material build-up.
Download Material Build-Up & Advanced Straightness Software Data Sheet
EV Gage Accessory
The DiaMetric™ Follower Solution
The DiaMetric™ follower system enables EV manufacturers to obtain 5 times greater accuracy, achieving sub-micron performance levels of ± .2 μm when measuring diameters on their existing Adcole 911 EV shaft measurement gage. Using the DiaMetric™ follower system, organizations can confidently measure concentric diameters on eccentric shafts, robotic shafts and electric motor rotors with tolerances of ‹10 μm. In addition, manufacturers can maintain absolute diameter accuracies with fewer gage calibrations.
Benefits of the DiaMetric™ Follower System
- Extends submicron diameter accuracy (± .2 μm) and repeatability for tighter diameter measurement tolerances
- Offers an affordable means to significantly improve diameter data using your existing 911 gage
- Allows manufacturers to consistently measure parts with a significant reduction in gage calibration, by eliminating 2 major variables that can contribute to measurement errors
- Provides extremely accurate concentric diameter measurements of parts with tolerances of ‹10 μm
- Includes rapid installation with minimal gage down-time
- Enables manufacturers to easily upgrade your existing 911 gages for improved diameter measurement accuracy


